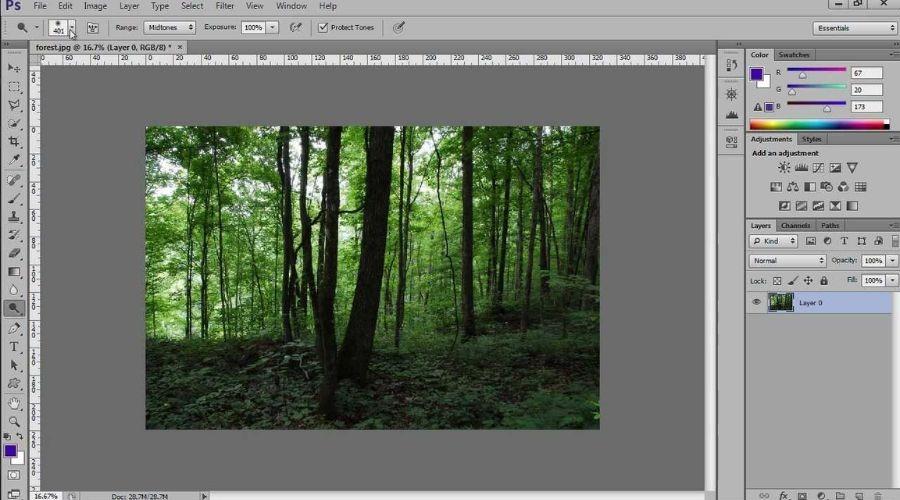
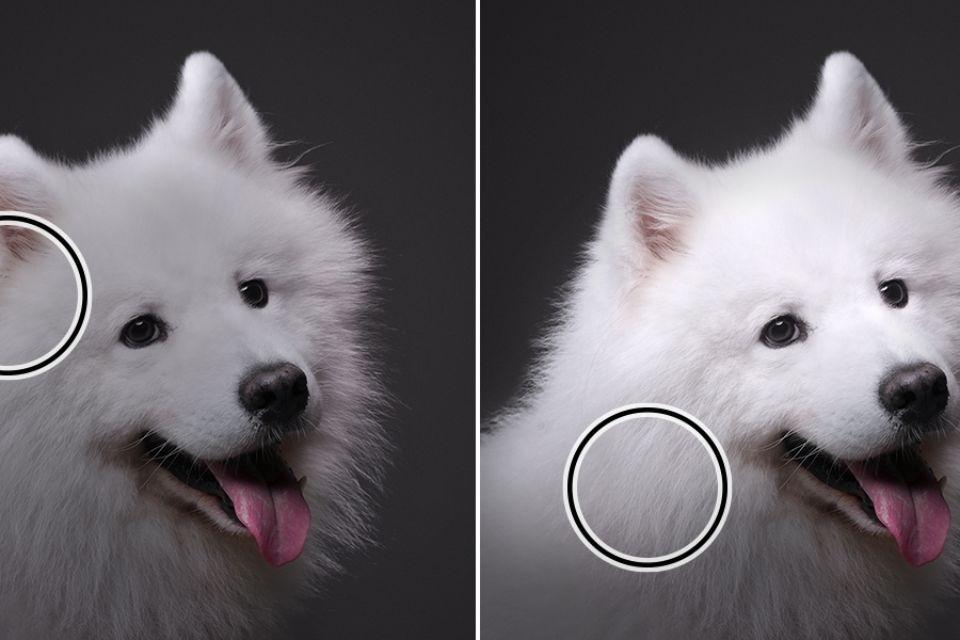
You may use the Dodge Tool Photoshop to brighten certain portions of an image without affecting the colour of those specific regions. It is possible to choose the Dodge option (O). To get the desired outcome, make adjustments to the brush size, range, and exposure settings located in the Options bar. Dodging is a technique used in photography to brighten different sections of a picture selectively. With the precision control provided by the Dodge Tool Photoshop, you can manually brighten the shadows, highlights, or mid-tones of your picture. The Photoshop CC 2021 Toolbar is located on the left side of the Photoshop window by default. But its location and size may be modified to suit your requirements. In this article, we will talk about how to use the Dodge Photoshop Tool.
How to use the Dodge Tool Photoshop

Using the Burn Tool, you can make pixels darker, and with the Dodge Tool Photoshop, you can make them lighter. You may “paint” onto your photo using your cursor in a manner that is quite similar to how it would look if you used the Brush Tool.
The Burn Tool and the Dodge Tool Photoshop are located in the same section of the Toolbar. You can find them both there. If neither is immediately obvious, then the Sponge Tool may be concealing them from view. If you hit O when either the Photoshop Dodge Tool or the Burn Tool is shown, it will become active.
If you have the Dodge Tool Photoshop or the Burn Tool selected, you may alter the size of the tool as well as the level of difficulty by selecting the appropriate buttons located at the very top of the program window. You are also given the option to choose a pixel range of your own choosing while using the application.
The highlights in your photograph will only be the brightest areas.
Mid-tones are so-called because their colours tend to lay somewhere in the centre of the spectrum between dark and bright.
The shadows are simply made up of the pixels that are the darkest. The length of time that an image is exposed determines the degree to which affected pixels shift.
Using the Dodge Tool Photoshop, whose size can be adjusted to be nearly the same as your smallest shadow, and with its range set to Shadows, you can “paint” on areas of a picture where shadows already exist by clicking and dragging to make them darker. The size of the Dodge Tool Photoshop can be adjusted to be nearly the same as your smallest shadow.
After setting the range to Highlights, you may use the Dodge Tool Photoshop to highlight the details in the image’s brightest areas by clicking and dragging.
Steps to use Dodge Tool Photoshop
- Choose the one that says “Dodge” (O) and go with it.
- You may get the desired look by modifying the parameters of the tools, such as the brush size, range, and exposure, using the Options bar.
- Move the cursor over the area of the picture that needs to be brighter.
The term “dodging” refers to the procedure that was formerly employed by photographers in the darkroom to illuminate certain sections of a picture. Photoshop’s “Dodge” tool is used to achieve the same effect as the traditional method. In Photoshop, the Dodge tool may be used to brighten a specific part of the image without changing the hue or saturation of the picture. Also, it may be used to draw attention to certain aspects of the picture. If we make heavy use of it, then the saturation will become apparent, turning the places we dodged into a light grey colour. Some artists classify the dodge tool as “destructive image manipulation” because once changes are performed with the tool, they cannot be undone.
Conclusion
If you want to use Dodge Tool Photoshop, then this article has all the details for you on how to use Dodge Tool Photoshop. For more information, please refer to Adobe and the official website of Trending Cult.


