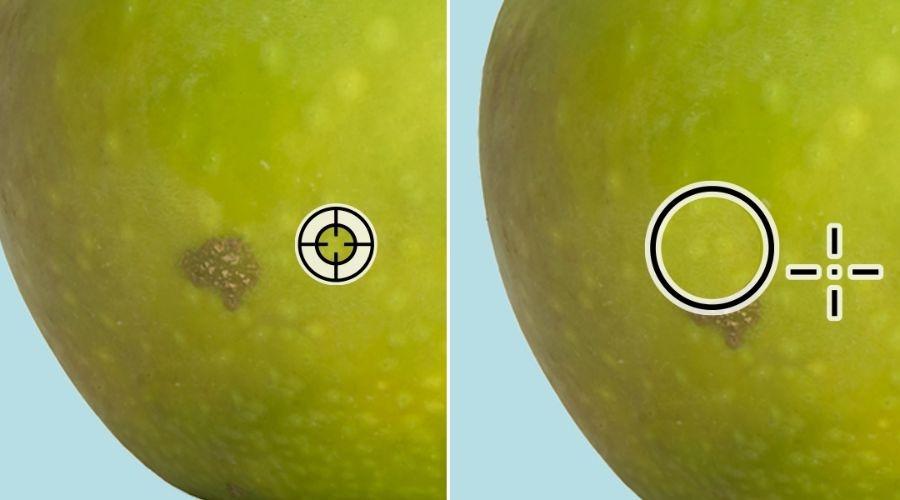
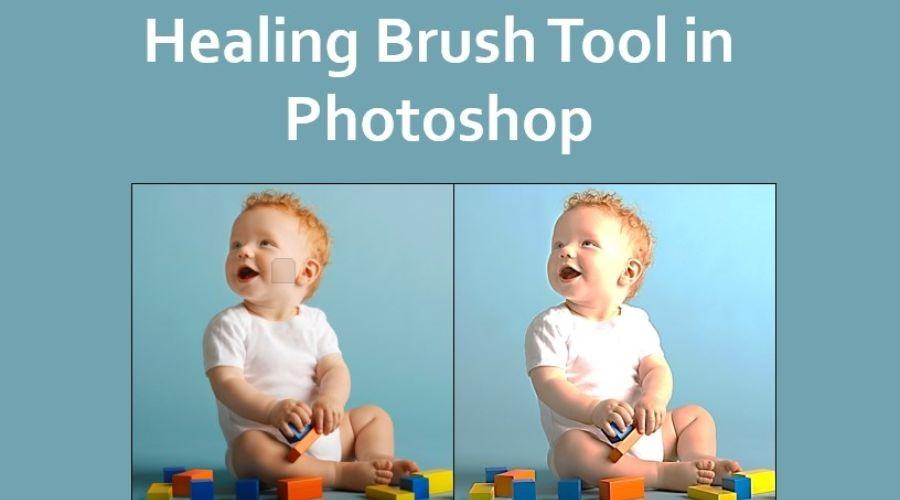
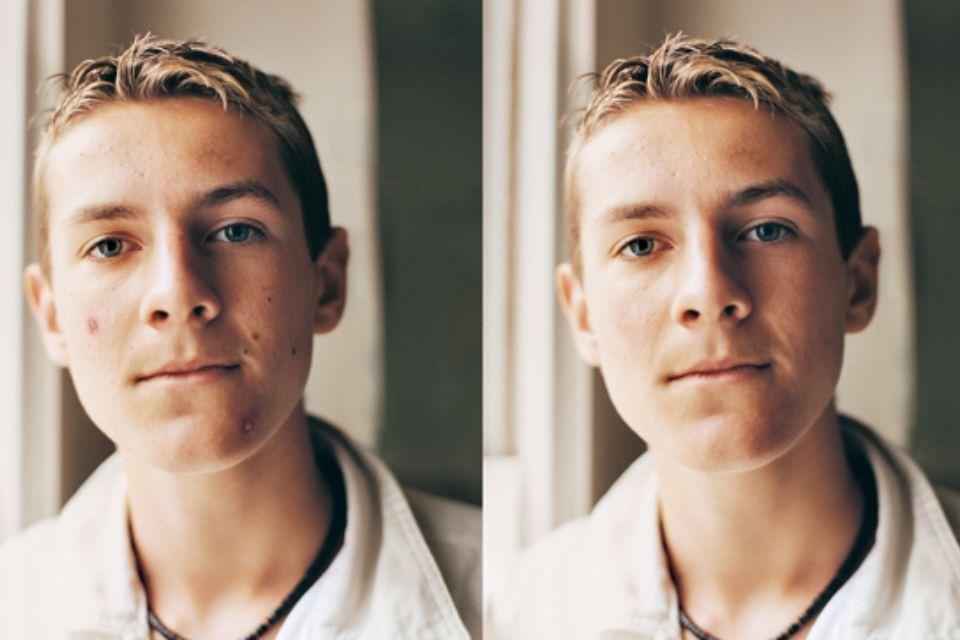
The image can be sampled and painted using the healing brush tool. Using Adobe Photoshop Healing Brush Tool, you can erase blemishes and other minor imperfections. Select the appropriate remedy and apply it with a click. Photoshop chooses and mixes in replacement pixels from another region of your picture. Several of the post-processing tools in Adobe Photoshop CC 2021 are particularly well-suited to the editing of e-commerce and product photography. In this article, we will tell you all the details on how to use the Healing Brush Tool.
Learn to use the Healing Brush Tool from Adobe

With the Healing Brush Tool, you can choose a part of your image and blend it into another part of the same layer.
If you can’t find it! It could be hiding behind the Patch Tool, the Content-Aware Move Tool, the Red Eye Tool, or the Spot Healing Brush Tool. If you can see it, you can use “J” to get to the Healing Brush Tool.
To utilise the Healing Brush Tool, hover your cursor over the region of your picture that you wish to sample. Hold down the ALT key (or the OPTION key on a Mac) and click on the sample area. When you hold down ALT/OPTION, the cursor will change into a target.
To choose which part of the image your sample will be blended into, move the cursor there. Click and hold your mouse to “paint” with your cursor in the new part of your image. The Healing Brush Tool will sample the old piece of your picture and paint it over the new region of your image, blending the pixels.
Much as with the Clone Stamp Tool, the Healing Brush Tool requires you to practise before you can master it. However, the Healing Brush Tool might be a better alternative than the Clone Stamp Tool to erase spots or flaws from a product picture, depending on the image and what you need to do to it. This is the use of the Healing Brush Tool Photoshop. Since the Healing Brush is not a detailed tool, you will need to use other tools, such as the Brush Tool, the Dodge Tool, and the Burn Tool, to finish the retouching. The Healing Brush will be useful in getting the job started. It is clear that the Healing Brush was responsible for a significant portion of the labour, but the garment still needs further detail and refined edges.
You may make flaws, such as scratches, wrinkles, dust spots, and so on, vanish into the surrounding picture by utilising the Healing Brush and Patch tools. These tools provide you with the ability to remedy faults. They function in a manner that is quite similar to that of the cloning tools. You take a sample of the pixels in one part of a picture, and then you paint over another area using those sampled pixels to replace those pixels.
Steps to use the Healing Brush Tool

Find out how to use the Healing Brush Tool to paint with pixels taken from other areas of your picture in order to fix defects.
- Choose the Healing Brush tool (J) from the options available in the toolbar. If you are having trouble locating the Healing Brush tool, click and hold the Spot Healing Brush tool to reveal the other tools that are associated with it, and then choose the Healing Brush tool from the list that appears.
- Click the brush sample in the tool options bar, and then adjust the Mode, Source, Aligned, Sample, and Diffusion settings in the pop-up box that appears after clicking the sample.
- In order to set the source sampling area, move the cursor over a region in your picture, and then either press the Alt key (on Windows) or the Option key (on Mac) (Mac).
- You may choose the sampling source you wish to use by clicking a button labelled “clone source” in the Clone Source window.
- Move the cursor to any part of the picture. Each time you let go of the mouse button, the sampled pixels are mixed in with the pixels that are already there.
A few pointers on how to get the most out of the Healing Brush Tool.
Fading the effect: When smoothing away wrinkles or laugh lines, you may want to preserve part of them for a more natural appearance. Fading the impact can be accomplished by following these steps:
- On the “Edit” menu, choose “Fade,” and then, under “Fade Command,” you will see whatever effect was most recently applied.
- Before applying the Healing Brush to the target, you should first select the region surrounding it. This will prevent any undesired colours from bleeding into the area that is being treated. This will restrict any modifications to only the region that has been chosen. This works particularly well in places where there is a high degree of contrast, and you do not want the dark or bright hue to seep into the region that you are focusing on.
Conclusion
You can use all the tools provided by Adobe for your use. In the article, we have provided you with all the details on the Healing Brush Tool and other tools used for photoshop. For more details, refer to Adobe and the official website of Trending Cult.


