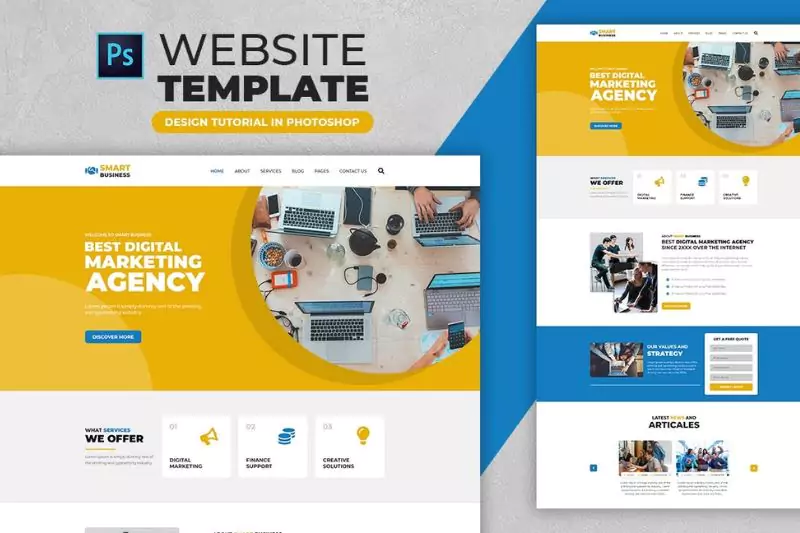
Layout design for a website involves more than just placing vibrant pictures and adding text to the text frames. It is a strategy that says a lot about your customer’s company. Colours and graphics on a website define the company’s character, whereas a well-designed website with simple navigation should connect the user to the business and transform him into a potential client. Every aspiring web designer must create a plan for a website that is attractive and simple. This tutorial is designed to walk you through starting from zero to create simple, clean website Templates in Photoshop. You will acquire crucial information that will aid you in furthering your understanding of web design during the process.
Benefits of creating Website Templates in Photoshop

There are many methods to create a beautiful website design, and you can do it with the help of design tools.
- Increased effectiveness when creating or updating your website
- More attractive website
- Increase traffic on the website.
- Quicker completion of the customer’s task
Create clean Website Templates in Photoshop

Step-1: Mockup
You can save time by placing your mockup file on your initial template. Designing your website becomes so simple that you’ll finish the foundation in minutes. The mockup, however, will only assist you in creating the outlines. Drawing the website templates in photoshop will take longer than finishing the design components with details, type arrangement, and alignment.
Step-2: set up the Canvas
End users access sites through various-sized desktop computers, cell phones, iPads, and tablets. In this unique scenario, you cannot adjust your web page to a specific size. For every instrument, however, some standard industry sizes are used. You will gradually discover your preferred measurement, or your client may suggest a website where the sizes are mimicked. Limit your width in accordance with industry norms instead of experimenting with horizontal scrolling. The size is restricted to 72 for the web. Recently, iPads and a few other tablets have been discovered to have pages and images with a higher resolution. However, this only happens occasionally, and given the global internet speed, it is preferable to stay with 72.
Select the files using the Ctrl+A keyboard shortcut and evenly space out guidelines across the template. A website should be well-structured, with each aspect arranged logically to the others. Guidelines for website design also make it simple for you to find it.
Step-3: choosing the colour schemes
Choosing a colour scheme comes after having your framework ready. However, preparing your colours before beginning to work on the plan is preferable. Icons, pictures, and colour selections should all be set before you begin working. Planning and organising your work will help you finish it faster and with less interruption. Many services can assist you in selecting from the archives’ millions of colour schemes. The following colour palette will be used to design the website templates in Photoshop. Remember to pick three or four colour schemes because you never know which one the client will favour. Save the shade values once the client has chosen a colour scheme, and make sure that the colours are essential to each business division, particularly the corporate identity.
Step-4: Initiating the Designing Process
There are numerous methods to preserve your designers’ work. There are no strict guidelines that must be followed when creating website templates in photoshop; the process largely depends on the designer’s preferences. Some designers prefer to construct the complete framework of blocks and frames before moving on to the details, type, and, ultimately, alignments and adjustments in the second stage. Some people prefer to read through one page at a moment before moving on to the next.
Step-5: Header and Footer
Your ingenuity will serve as the guideline for determining the header or banner’s dimensions. Websites now frequently display a huge picture that completely fills your computer screen. Fashion, known as the Hero image, has recently gained much popularity. Solid colour designs have a flat appearance that clashes with bigger frames or images. A gradient overlay layer can be applied on top of the banner to prevent the flat appearance. It adds depth to the banner that gradually changes from one hue to another. At this stage, you can start importing the logo on the corner of the header and adjust the website layout vector. You can also add text, special features and images of your choice to the website photoshop template.
Step-6: Blend Layers to show the effect on Images
- Affix the picture layer above the blue banner.
- Put the Gradient Overlay on top of the picture.
- Change the image’s opacity to 40% and the blending style to ‘differ’.
- To see how the layers are stacked on top of one another, look at the layers palette in the preceding picture.
Step-7: Design the Service
Guides are your best allies when it comes to text alignment. Combining the white space and leaving equal gaps between design components can achieve coherence within types and objects. You can follow a number of website templates in photoshop guidelines to ensure that there is enough white space around all of the items in the frame.
Step-8: Create Form Field
The creation of the Form field is the following stage in our design. To get a better look, layer the picture below the solid colour layer and apply a gradient layer on top of the two layers. When positioning bigger images, experimenting with the blending modes is always necessary.
Conclusion
This article aims to show you how to use website templates in Photoshop to design a simple web page structure. The user can use these straightforward directions to comprehend the basics of creating website templates for Photoshop. For more information, visit Adobe and the official website of Trending Cult.
FAQ’s


