
One of the most popular tools for graphic designers and image editors is Photoshop. It provides a wide range of choices for enhancing and modifying images. The Distortion Effect is one of the most well-known and frequently utilised effects. Utilising the Distortion Effect, one can produce original and imaginative designs for various graphics and pictures. You can edit pictures in Photoshop to produce a variety of visual effects by using the effect. An image can be stretched, skewered, twisted, or warped in any way using this effect. You can use this effect to make anything, from abstract art to photo manipulations, appear realistic.
This essay will explain how to use the Photoshop Distortion Effect to produce stunning visuals. We’ll review Photoshop’s various deformation effects and how to use them on your photos. We’ll also look at some pointers and techniques that can assist you in getting the outcomes you want.
Photoshop’s Distortion Effect can give your creations a fresh perspective, whether you work as an expert or a hobbyist graphic designer. You can make your work stick out by creating original and striking designs and learning to use this effect. Let’s begin by learning how to apply the Photoshop Distortion Effect.


Steps: How to Use Distortion Effect in Photoshop?
Photoshop has a fantastic feature called the warping effect that can be used to produce beautiful pictures. The methods for applying this effect in Photoshop are as follows:
Step 1: Open Photoshop and become acquainted with the user interface as step one. The primary elements of the interface are the show window, tool panel, property bar, menu bar, and property bar.
Step 2: Select a picture from your computer and drag it into the Photoshop display window to open it.
Step 3: Modify the width and height of your picture to change its size. Select the commit or checkmark button on the property bar to apply your changes. Give the image a new moniker of your choosing.
Step 4: Press Ctrl + J on the keyboard to duplicate the picture layer after choosing it in the layer panel.
Step 5: Click the Quick Selection tool with the mouse’s left button in the tool menu.
Step 6: Using the Quick Selection tool, pick the picture area containing the object you wish to distort.
Step 7: To separate the object from the source image, press Ctrl + J.
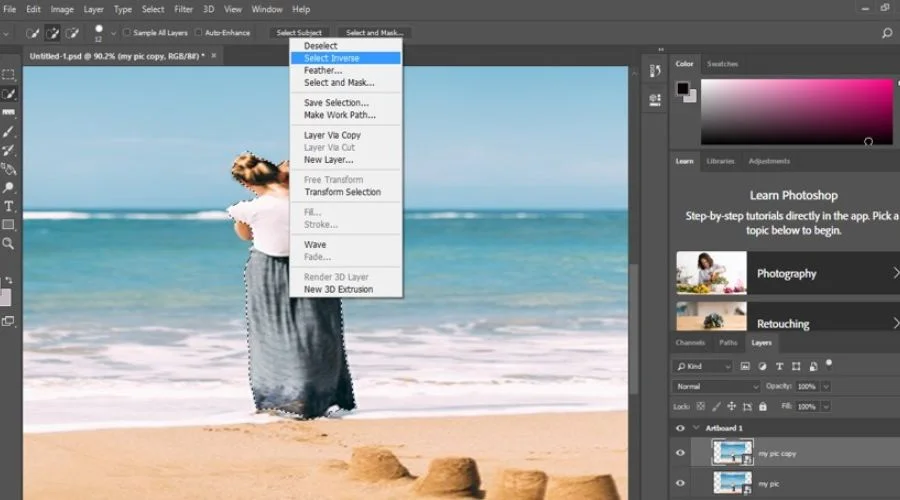
Step 8: Right-click the duplicate layer in the show window area and select the Select Inverse option from the popup menu.
Step 9: To remove the background from the initial image, press Ctrl + J.
Step 10: Select the divided background layer after positioning the separated object layer above the background layer.
Step 11: In the menu area, click the Filter button and then choose Distort from the drop-down menu. Any of the choices for the Distort effect can be chosen.
Step 12: Change the ripple’s size by dragging the slider on the Amount option or entering any value immediately using the dialogue box’s keyboard entry technique.
Step 13: Click the OK button to add the Distort effect to the image.
Step 14: Click the Clone Stamp tool with the mouse’s left button to pick it from the tool panel.
Step 15: Adjust the size of the clone tool using the property tab.
Step 16: While holding down the Alt key on the keyboard, copy the portion of the picture. You want to use it to hide the unwanted parts of your image. It is duplicated around the item.
Step 17: Your image will be ready with the Distortion Effect once you’ve cloned around the object’s border.
These easy steps will help you use Photoshop’s Distortion Effect to produce stunning images.
Conclusion
The distortion Effect can give your photos and graphics a distinctive and artistic feel. Photoshop offers numerous tools and methods for adding effects to your pictures, ranging from straightforward to complex. One of the most well-liked and flexible tools for achieving the Selfie Distortion Effect is the Liquify filter, which lets you warp, swirl, bulge, and pinch any picture area. Additionally, you can use the Polar Coordinates filter to turn your picture into a circle and the Spherize filter to produce a spherical or curved effect. Additionally, you can use the Warp tool and the Puppet Warp feature to bend and shape particular portions of the picture to suit your needs.
To avoid overusing the effect, which can degrade the picture’s overall quality, it is crucial to use them carefully and strategically. To get the intended result, experiment with various tools and settings. Additionally, you can mix various Flashed face Distortion Effects to produce a more intricate and distinctive appearance. While learning Photoshop’s Distortion Effect can take some practice, it’s worthwhile. For more information, visit the official website Trendingcult.
FAQs