
It happens that you need to get the picture you wanted. Even if you manage to get the best pictures, something incomplete needs to be removed. You can use Photoshop to edit images. It is software used by individuals and professionals alike. The software has Different techniques and creative features that alter the looks of an image. One of the many effects you can use to transform your pictures is the Fisheye effect.
The Fisheye effect is one of the effects that give a lens-type effect to your image. This article will look into the components of the Fisheye effect and provide insights on how to apply the effect to make your image different from normal ones.


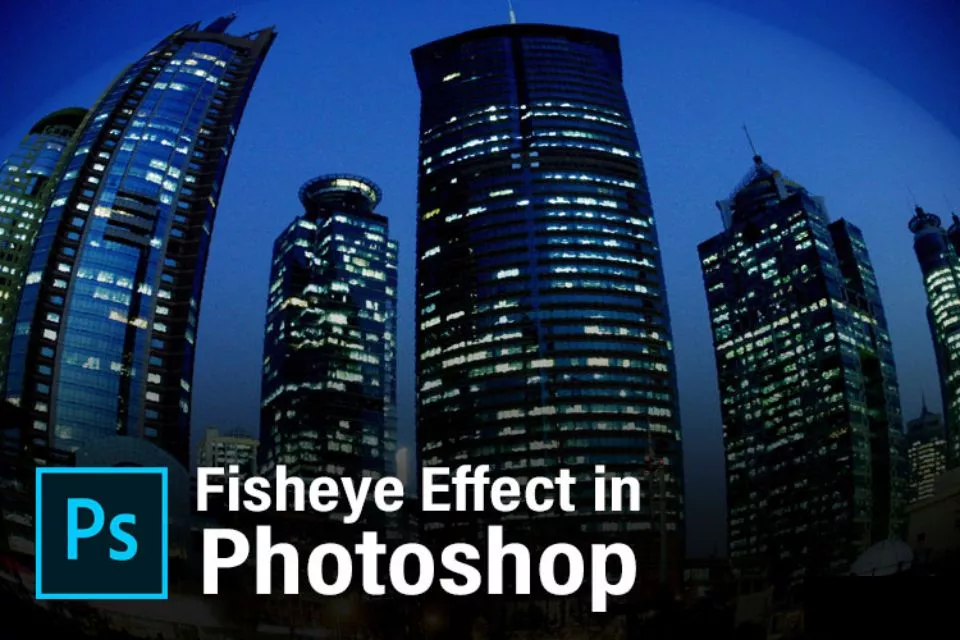
What is the fisheye effect?
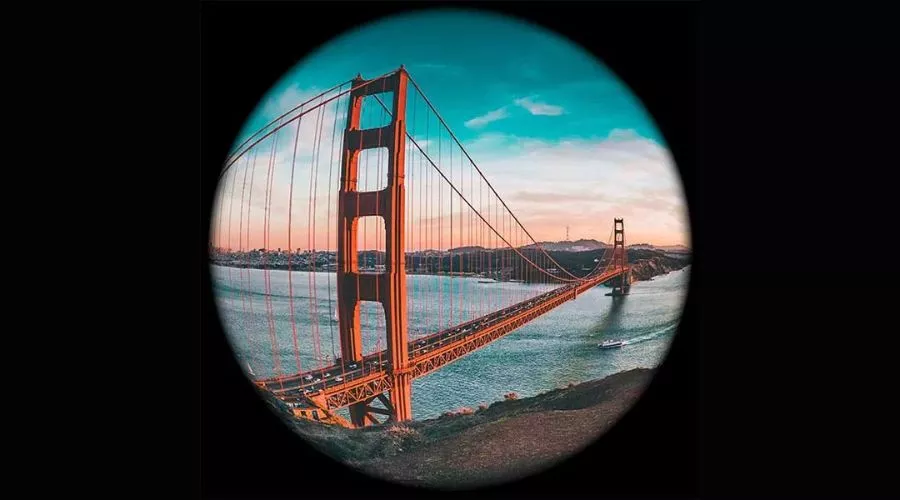
The fisheye effect is one of the distortions that make any image appear closer than they actually are. The lenses used are wide-angle lenses (fisheye lens effect) with a short focal length. It makes the centre of the image appear very big and smaller at the edges.
Applying the Fish eye effect in Photoshop
Applying the Fisheye effect on your images is quite simple; you can do it in the simple steps listed down below:
On the top of the user screen, you will find the “Menu bar.” It creates different menus to set various parameters of the software. Below this bar is a property bar of active images or tools that allows you to make necessary changes. On the left section, a toolbar bar is there that offers multiple tools, and the centre screen is the screen where you can see the work you do or the image you edit. The right side contains tabs, including layers, colours, and some others. You can make adjustments to these sections as you like.
Step 1: First, select a picture you want to edit. Now, pick the image with the mouse’s left button and drop it into the window area of Photoshop software. Find the “File menu” and click on it. From the dropdown list, click on the ‘Place embedded’ option with the mouse’s left button. After clicking on the ‘Place embedded’ option, a dialogue box will appear to place the image on the centre screen. Click on the image and then click the ‘Place’ button appearing on the dialogue box.
Step 2: Adjust the image size suitable to you. On the photo’s property bar, click the ‘Commit Transform.’
Step 3: Next, you need to go to the ‘Image’ menu and click on the option of the image size from the dropdown list to change the image size repeatedly.
Step 4: Let’s say you want a square image. For that, you must specify the image width and height. Press the ‘Ok’ button to confirm the sizing of the image. The fisheye feature of Photoshop is properly given in square images. You can rename the image by double-clicking on the name of your choice. Let’s say you have renamed it as Pic 1.
Step 5: Copy the image using Ctrl+J for future use. Using the Ctrl+T shortcut key, you can rotate the image to whatever degree you like. Apply the transformation.
Step 6: Follow the next step now, i.e., go to the layer panel. Here, hide the Pic 1 layer by clicking on the ‘eye button.’
Step 7: Repress the Ctrl+T for the transform box around the selected photograph. After clicking the mouse’s right button, choose the ‘Warp’ option from the dropdown list.
OR
Select the “Edit Menu”. A dropdown list will appear from which you must select the ‘Transform’ option. After that, click on the ‘Warp’ option of the new dropdown list.
Step 8: After you click on the ‘Warp’ option, the image will be bounded by a bounding box.
Step 9: Go to the “Custom” option of the property bar. Click on the ‘Fisheye’ option from the dropdown list of ‘Warp.’ After clicking on the ‘Fisheye’ option, the bounding box changes and makes the image appear closer.
Step 10: From the property bar of Warp, you can vary the values of the ‘Bend’ option. Change the image’s horizontal and vertical scale value by changing the value of the ‘H’ and ‘V’ options, respectively.
Step 11: After doing the above step, Press ‘Enter.’
Step 12: From the toolbar, take the rectangle tool. Draw the rectangle over the edited picture and fill it with a colour of your choice. After that, visit the “Layer Panel”. Then, bring the edited image over the rectangular one by dragging it by clicking on the mouse’s left button.
The image is now over the rectangle layer, and the rectangular layer is set as a background for the fisheye image.
Conclusion
The fisheye effect in Photoshop can be used to transform ordinary images into visually captivating masterpieces. It provides a distinct curvature and distortion, creating depth, drama, and a fun, surreal quality. Moderation and experimentation are key, as they may not be suitable for every image, but with practice and a discerning eye, you can effectively incorporate them into your photography. After reading this, you must have had more familiarity with the Fisheye effect in Photoshop. Now you know how to apply this effect in Photoshop to get an effective result. You can get a better understanding of the fisheye effect online at Trendingcult.